
Setting FE dev env using Eclipse
Preparation
- JDK 1.8+
- Maven 3.x+
- Eclipse, with M2Eclipse installed
Code Generation
The FE module requires part of the generated code, such as Thrift, Protobuf, Jflex, CUP and other frameworks.
Windows
-
Under Linux, enter the source code directory
feand execute the following command:mvn generate-sources -
If use windows as development environment, then package the generated
fe/fe-core/target/generated-sourcesdirectory:fe/fe-core/target/ && tar czf java.tar.gz generated-sources/ -
Copy
java.tar.gzto thefe/fe-core/target/directory of the development environment and unzipcp java.tar.gz /path/to/doris/fe/fe-core/target/
cd /path/to/doris/fe/fe-core/target/ && tar xzf java.tar.gz
MacOS
We can use maven to do code generation or in other words build FE project directly on MacOS.
-
Install apache thrift from source code or
brewif you don't have one -
Create a directory
thirdparty/installed/bin, and link command thrift into it.mkdir -p thirdparty/installed/bin
ln -s ${thrift_installed_full_path} thirdparty/installed/bin/thrift -
Call
mavento build FE project, if something went wrong, check you$JAVA_HOME, java version and newly installed commandthriftwork correctly.cd fe && mvn package -DskipTests=true -Dos.arch=x86_64
Option -Dos.arch=x86_64 in step 3 is for compatibility of Apple's M series
CPU.
Note: 0. cup and jfex use java jar to do code generation, the process is platform independent.
- Code generation of protobuf is done by
protoc-jar-maven-plugin, which uses precompiled binaries of different archs to make it seems platform independent. - thrift is the only one relies on
thirdparty/installed, which needs to be built from source. We will make it independent onthirdparty/installedsomeday (TODO).
Import FE project
Import as eclipse project
-
In the
fe/directory of the development environment, execute the following command to generate the Eclipse project file:cd /path/to/doris/fe/ && mvn -npr eclipse:eclipse -Dskip.plugin=trueAfter the execution is completed, the
.projectand.classpathfiles will be generated in thefe/directory. -
Import FE project
- Open Eclipse, choose
File -> Import. - Choose
General -> Existing Projects into Workspace. Select root directoryand choosefe/directory, clickFinishto finish.- Right click the project, and choose
Build Path -> Configure Build Path. - In the
Java Build Pathdialog, choose theSourcetab, clickAdd Folder, and select thejava/directory that was copied and unzipped before adding. - Click
Apply and Closeto finish.
- Open Eclipse, choose
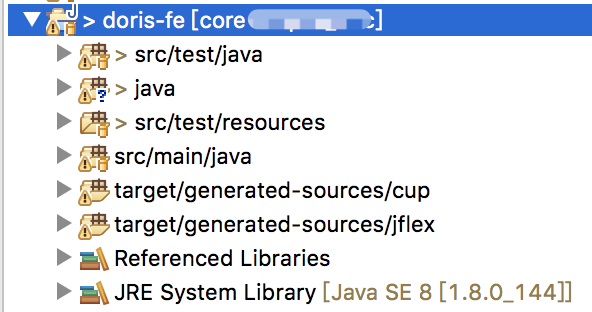
At this point, FE project import is complete. The project directory in Eclipse is roughly as follows:
Import as maven project
We are able to build FE with maven, if we have done all the operations related to MacOS. And we are now of course able to import FE project as a maven project in eclipse.
In eclipse menu File select Import -> Maven -> Existing Maven Projects,
Choose doris fe directory to finish import. It's recommended to use working set
to manage the all modules of FE.
Enjoy developing and debugging FE in eclipse!
Run Unit Test
Right-click on the unit test file you want to run and select Run As -> JUnit Test. (If you want to debug, select Debug As -> JUnit Test).
If the following error occurs:
java.lang.Exception: Method xxxx should have no parameters
Then right-click the unit test file and select Run As -> Run Configurations.... (If you want to debug, select Debug As -> Debug Configurations...).
Add to the VM arguments in the Arguments tab:
-javaagent:${settings.localRepository}/org/jmockit/jmockit/1.48/jmockit-1.48.jar
Among them, ${settings.localRepository} should be replaced with the path of the maven library path, such as:
-javaagent:/Users/cmy/.m2/repository/org/jmockit/jmockit/1.48/jmockit-1.48.jar
Then just run Run/Debug.
Run FE
You can directly start an FE process in Eclipse to facilitate debugging the code.
-
Create a runtime directory
mkdir /path/to/doris/fe/run/
cd /path/to/doris/fe/run/
mkdir conf/log/doris-meta/ -
Create configuration file
Create the configuration file
fe.confin theconf/directory created in the first step. You can directly copyconf/fe.confin the source directory and make simple changes. -
Find the
src/main/java/org/apache/doris/DorisFE.javafile in Eclipse, right-click and selectRun As -> Run Configurations.... Add the following environment variables to theEnvironmenttab:DORIS_HOME: /path/to/doris/fe/run/PID_DIR: /path/to/doris/fe/run/LOG_DIR: /path/to/doris/fe/run/log
-
Right-click
DorisFE.javaand selectRun As -> Java Applicationto start FE.
To run a UT, a FE service will be started at first. And then, UT cases execute as client and test corresponding logics. When errors occur, only client logs will be print in UT logs. If you need more information from server logs, you can view logs in ${DORIS_HOME}/fe/mocked.
Code Update
Imported as eclipse project
-
Update lexical and grammar files or proto and thrift files
If you modified
fe/src/main/cup/sql_parser.cuporfe/src/main/jflex/sql_scanner.flexfile or proto and thrift files. You need to execute the following commands in thefe/directory:mvn generate-sourcesThen refresh the project in Eclipse.
-
Update maven dependencies
If you update the dependency in
fe/pom.xml, you need to execute the following command in thefe/directory:mvn -npr eclipse:eclipse -Dskip.plugin=trueThen refresh the project in Eclipse. If it cannot be updated, it is recommended to delete the project and import it again according to this document.
Imported as maven project
-
Update lexical and grammar files or proto and thrift files
cd fe && mvn package -DskipTests=true -Dos.arch=x86_64 -
Update maven dependencies, in eclipse
Package Explorerright click on the projectmaven -> update project... -
Refresh project in eclipse
Imports Order
In order to maintain the Imports order of Java, please perform the following operations to set the Imports Order of the project.
-
Create the file
fe_doris.importorderand write the following:#Organize Import Order
#Wed Jul 01 16:42:47 CST 2020
4=javax
3=java
2=org
1=com
0=org.apache.doris -
Open Eclipse Preferences, select
Java -> Code Style -> Organize Imports. ClickImportto import the above file.