使用 IntelliJ IDEA 搭建 FE 开发环境
本文介绍如何在 Linux、macOS、Windows 平台上使用 IntelliJ IDEA 搭建 Doris FE(Frontend)的开发与调试环境。
1. 环境准备
要求:JDK 1.8+,IntelliJ IDEA。
1.1 拉取源码
从 GitHub 下载 Doris 源码到本地:
git clone https://github.com/apache/doris.git
用 IDEA 打开时,建议直接打开源码下的 fe 子目录,而不是整个 Doris 仓库根目录,避免后续与 CLion(打开 be 目录)产生冲突。
1.2 安装 Thrift
如果你只做 FE 开发、没有完整编译过 thirdparty,需要单独安装 Thrift,并将其拷贝或软链到 thirdparty/installed/bin 目录下。
| Doris 版本 | 对应 Thrift 版本 |
|---|---|
| 0.15 ~ 1.2 | 0.13.0 |
| 1.2+ | 0.16.0 |
下文以 0.16.0 为例,0.13.0 同理。
macOS
brew tap homebrew/core --force
brew tap-new $USER/local-tap
brew extract --version='0.16.0' thrift $USER/local-tap
brew install thrift@0.16.0
如果下载时报错,可以修改:
/usr/local/Homebrew/Library/Taps/$USER/homebrew-local-tap/Formula/thrift@0.16.0.rb
将其中的:
url "https://www.apache.org/dyn/closer.lua?path=thrift/0.16.0/thrift-0.16.0.tar.gz"
修改为:
url "https://archive.apache.org/dist/thrift/0.16.0/thrift-0.16.0.tar.gz"
参考:https://gist.github.com/tonydeng/02e571f273d6cce4230dc8d5f394493c
Linux
wget https://archive.apache.org/dist/thrift/0.16.0/thrift-0.16.0.tar.gz
yum install -y autoconf automake libtool cmake ncurses-devel openssl-devel lzo-devel zlib-devel gcc gcc-c++
tar zxvf thrift-0.16.0.tar.gz
cd thrift-0.16.0
./configure --without-tests
make
make install
安装完成后查看版本:
thrift --version
Windows
- 下载:http://archive.apache.org/dist/thrift/0.16.0/thrift-0.16.0.exe
- 拷贝到
./thirdparty/installed/bin
如果已完整编译过 Doris,则不需要重复安装 Thrift,可直接复用
$DORIS_HOME/thirdparty/installed/bin/thrift。
2. 生成代码
Linux / macOS
在源码根目录下执行:
sh generated-source.sh
等待显示 Done 即可。
1.2 及之前版本使用
cd fe && mvn generate-sources。如果出现错误,则执行cd fe && mvn clean install -DskipTests。
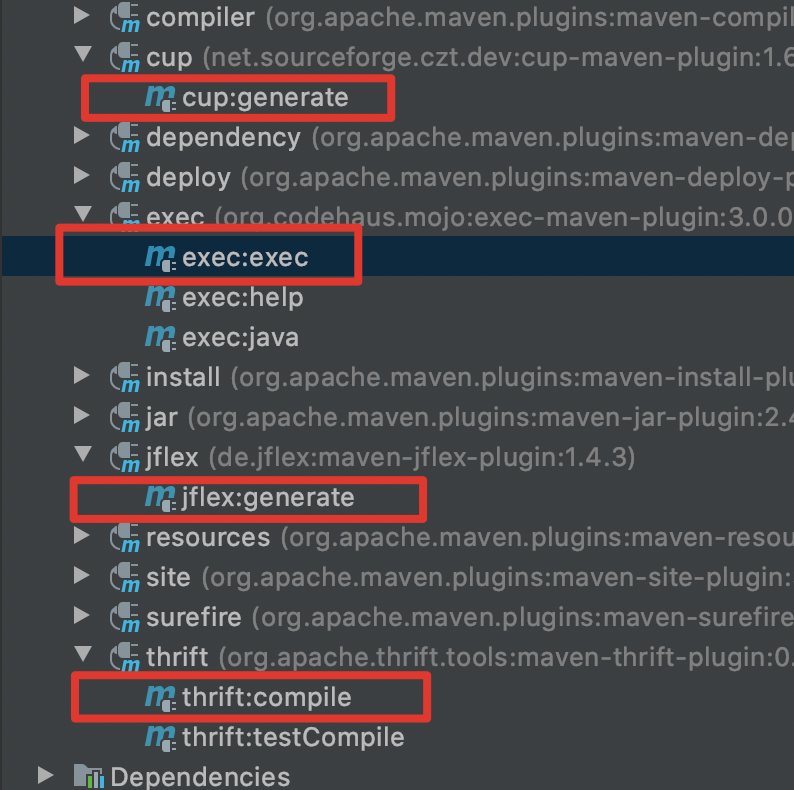
也可以通过 IDEA 图形界面运行对应的 Maven 命令:
Windows
Windows 下可能无法执行 make 命令和 Shell 脚本,可以采用以下任一方式:
- 从 Linux 上拷贝已生成的
fe/fe-core/target/generated-sources目录到 Windows 对应位置; - 通过 Docker 挂载本地目录后,在 Docker 内部生成自动生成代码(参考 源码编译 一节)。
3. 生成 Help 文档
如果你还未生成过 Help 文档,需要执行:
cd doris/docs
sh build_help_zip.sh
cp build/help-resource.zip ../fe/fe-core/target/classes
4. 配置 IDEA 调试
4.1 导入工程
用 IDEA 导入 fe 工程。
4.2 准备目录
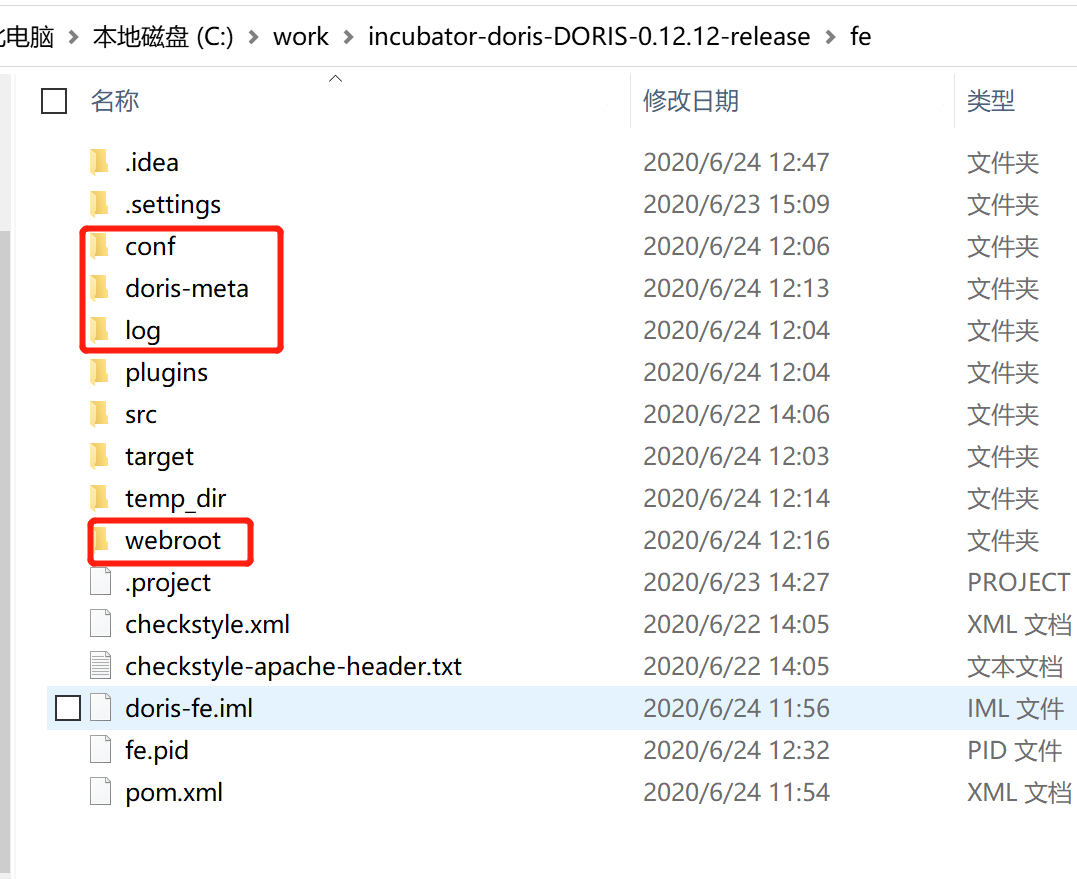
在 fe 目录下创建调试所需的目录(新版本中该目录可能已存在):
4.3 编译 UI(可选)
编译 ui 项目,将 ui/dist/ 目录中的文件拷贝到 webroot 中。如果你不需要查看 Doris UI,这一步可以跳过。
4.4 配置 fe.conf
下面是一个参考的 conf/fe.conf 配置,可按需修改:
LOG_DIR = ${DORIS_HOME}/log

DATE = `date +%Y%m%d-%H%M%S`
JAVA_OPTS="-Xmx2048m -XX:+UseMembar -XX:SurvivorRatio=8 -XX:MaxTenuringThreshold=7 -XX:+PrintGCDateStamps -XX:+PrintGCDetails -XX:+UseConcMarkSweepGC -XX:+UseParNewGC -XX:+CMSClassUnloadingEnabled -XX:-CMSParallelRemarkEnabled -XX:CMSInitiatingOccupancyFraction=80 -XX:SoftRefLRUPolicyMSPerMB=0 -Xloggc:$DORIS_HOME/log/fe.gc.log.$DATE"

# For jdk 9+, this JAVA_OPTS will be used as default JVM options
JAVA_OPTS_FOR_JDK_9="-Xmx4096m -XX:SurvivorRatio=8 -XX:MaxTenuringThreshold=7 -XX:+CMSClassUnloadingEnabled -XX:-CMSParallelRemarkEnabled -XX:CMSInitiatingOccupancyFraction=80 -XX:SoftRefLRUPolicyMSPerMB=0 -Xlog:gc*:$DORIS_HOME/log/fe.gc.log.$DATE:time"

sys_log_level = INFO

http_port = 8030
rpc_port = 9020
query_port = 9030
arrow_flight_sql_port = -1
edit_log_port = 9010

# priority_networks = 10.10.10.0/24;192.168.0.0/16
如果你在 macOS 上通过 Docker for Mac 运行 BE,由于 docker for Mac 不支持 Host 模式,需要使用 -p 方式暴露 BE 端口,同时 fe.conf 的 priority_networks 要配置为容器内可访问的 IP(例如 WIFI 的 IP)。
4.5 设置 IDEA 运行环境变量
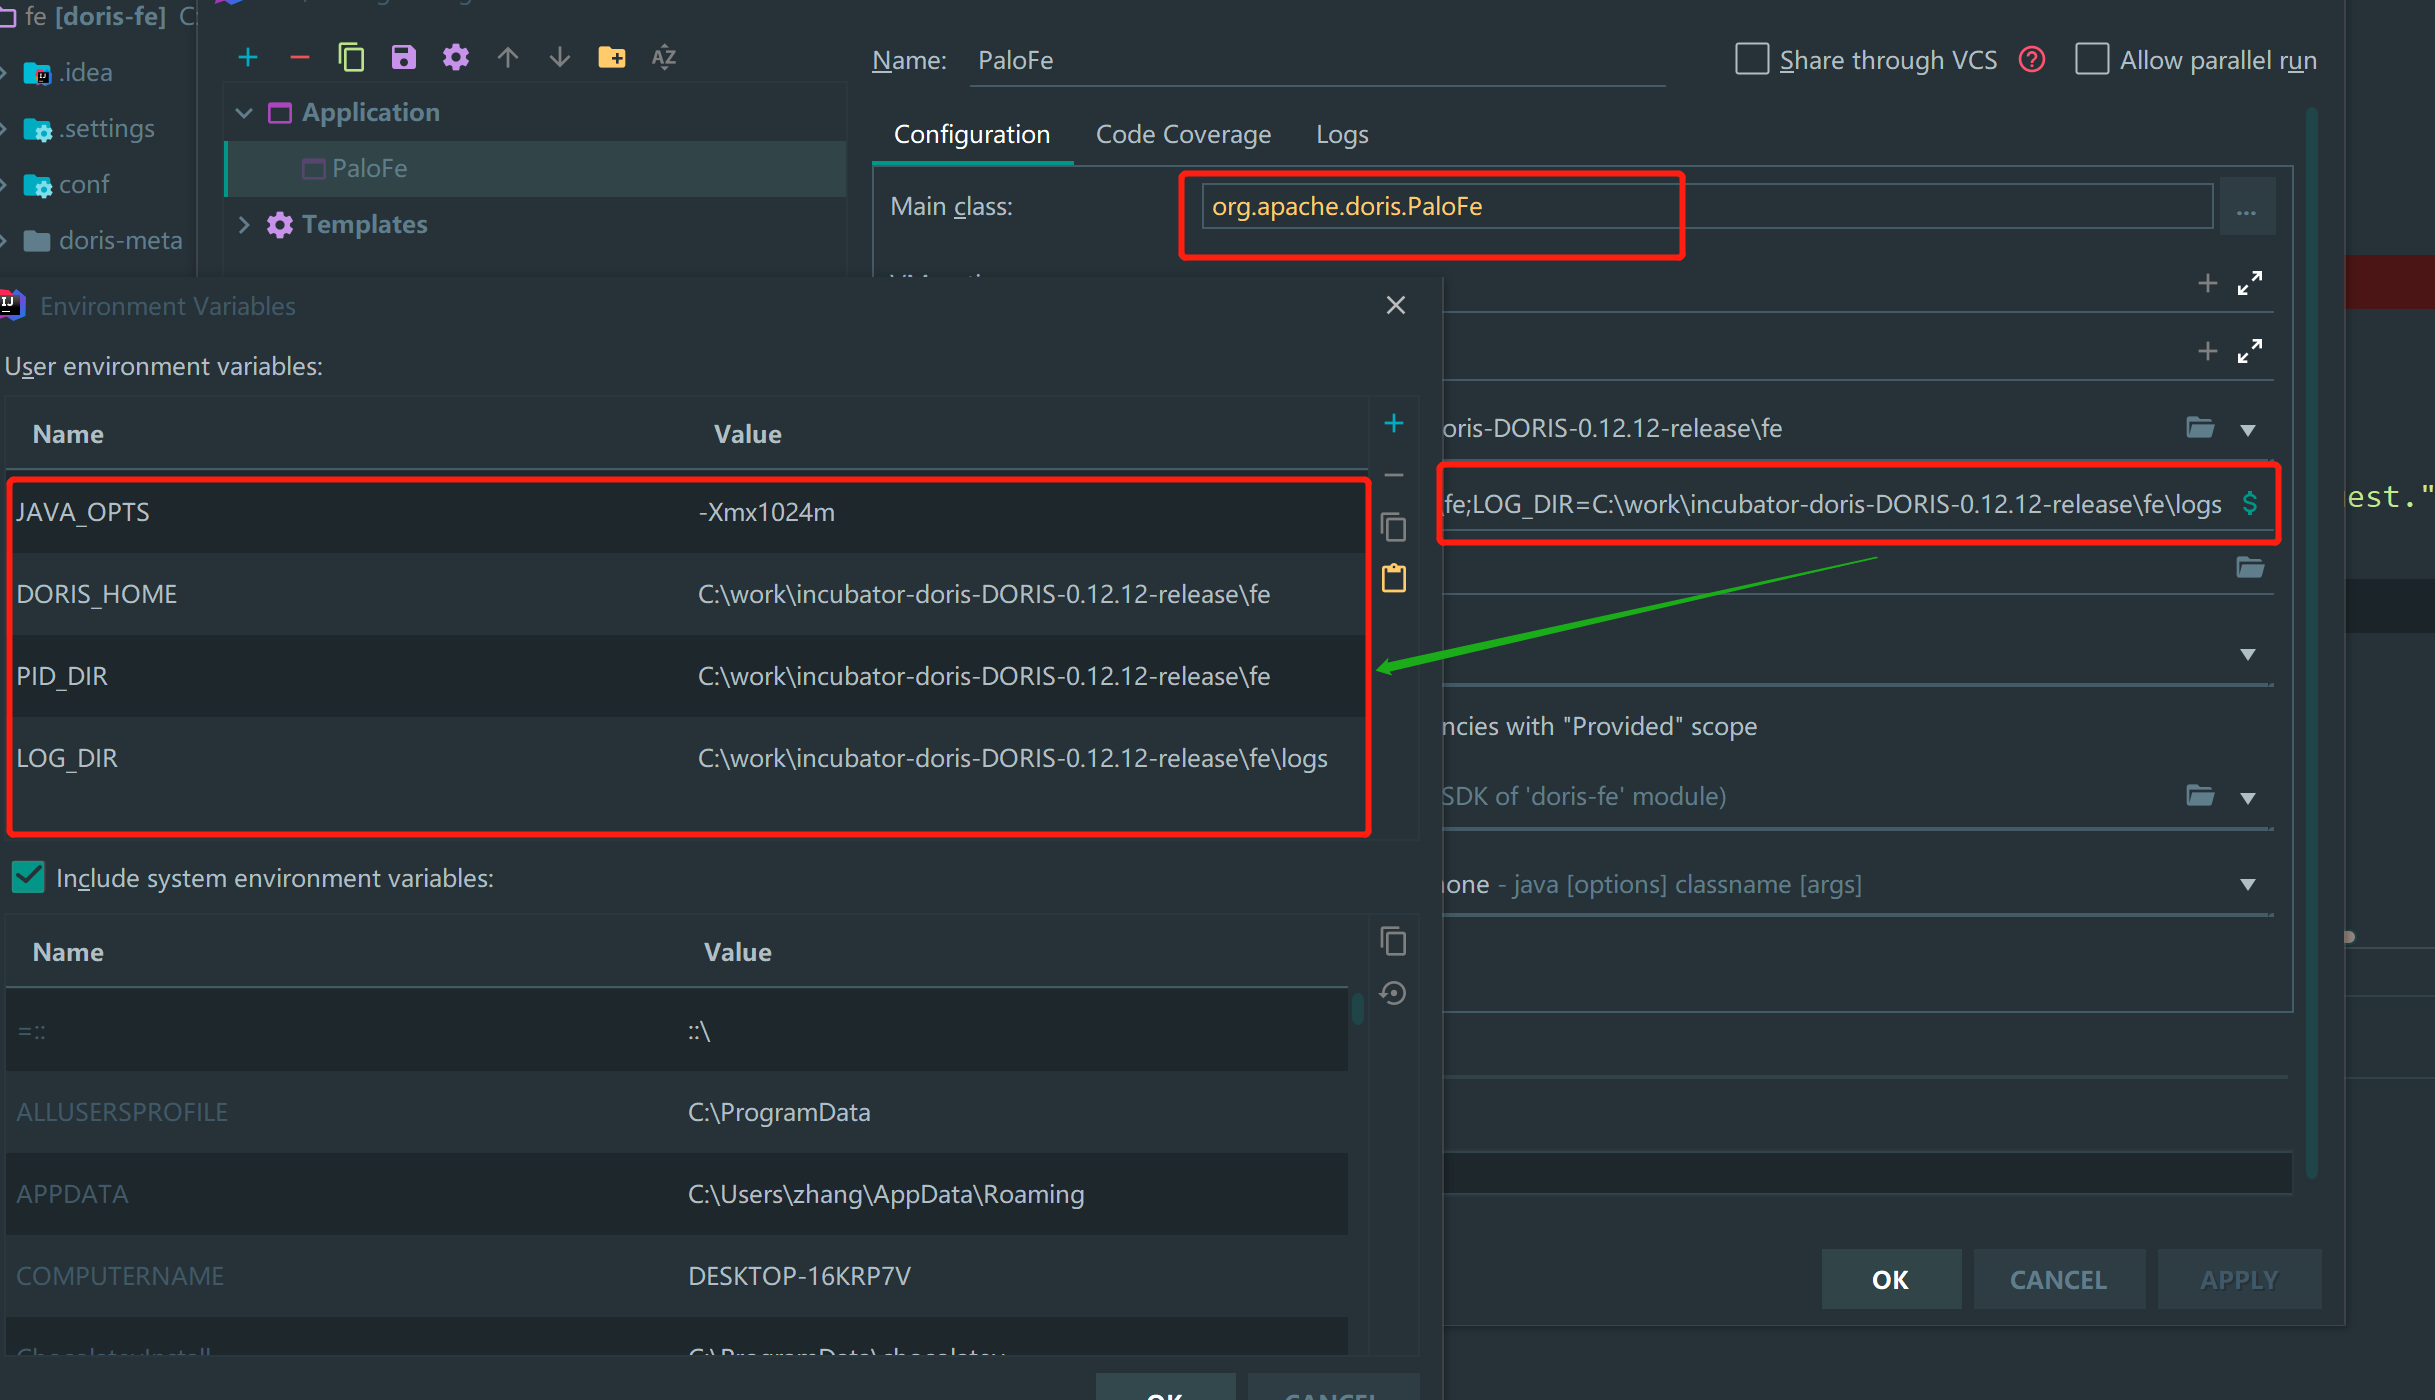
在 IDEA 中设置运行环境变量:
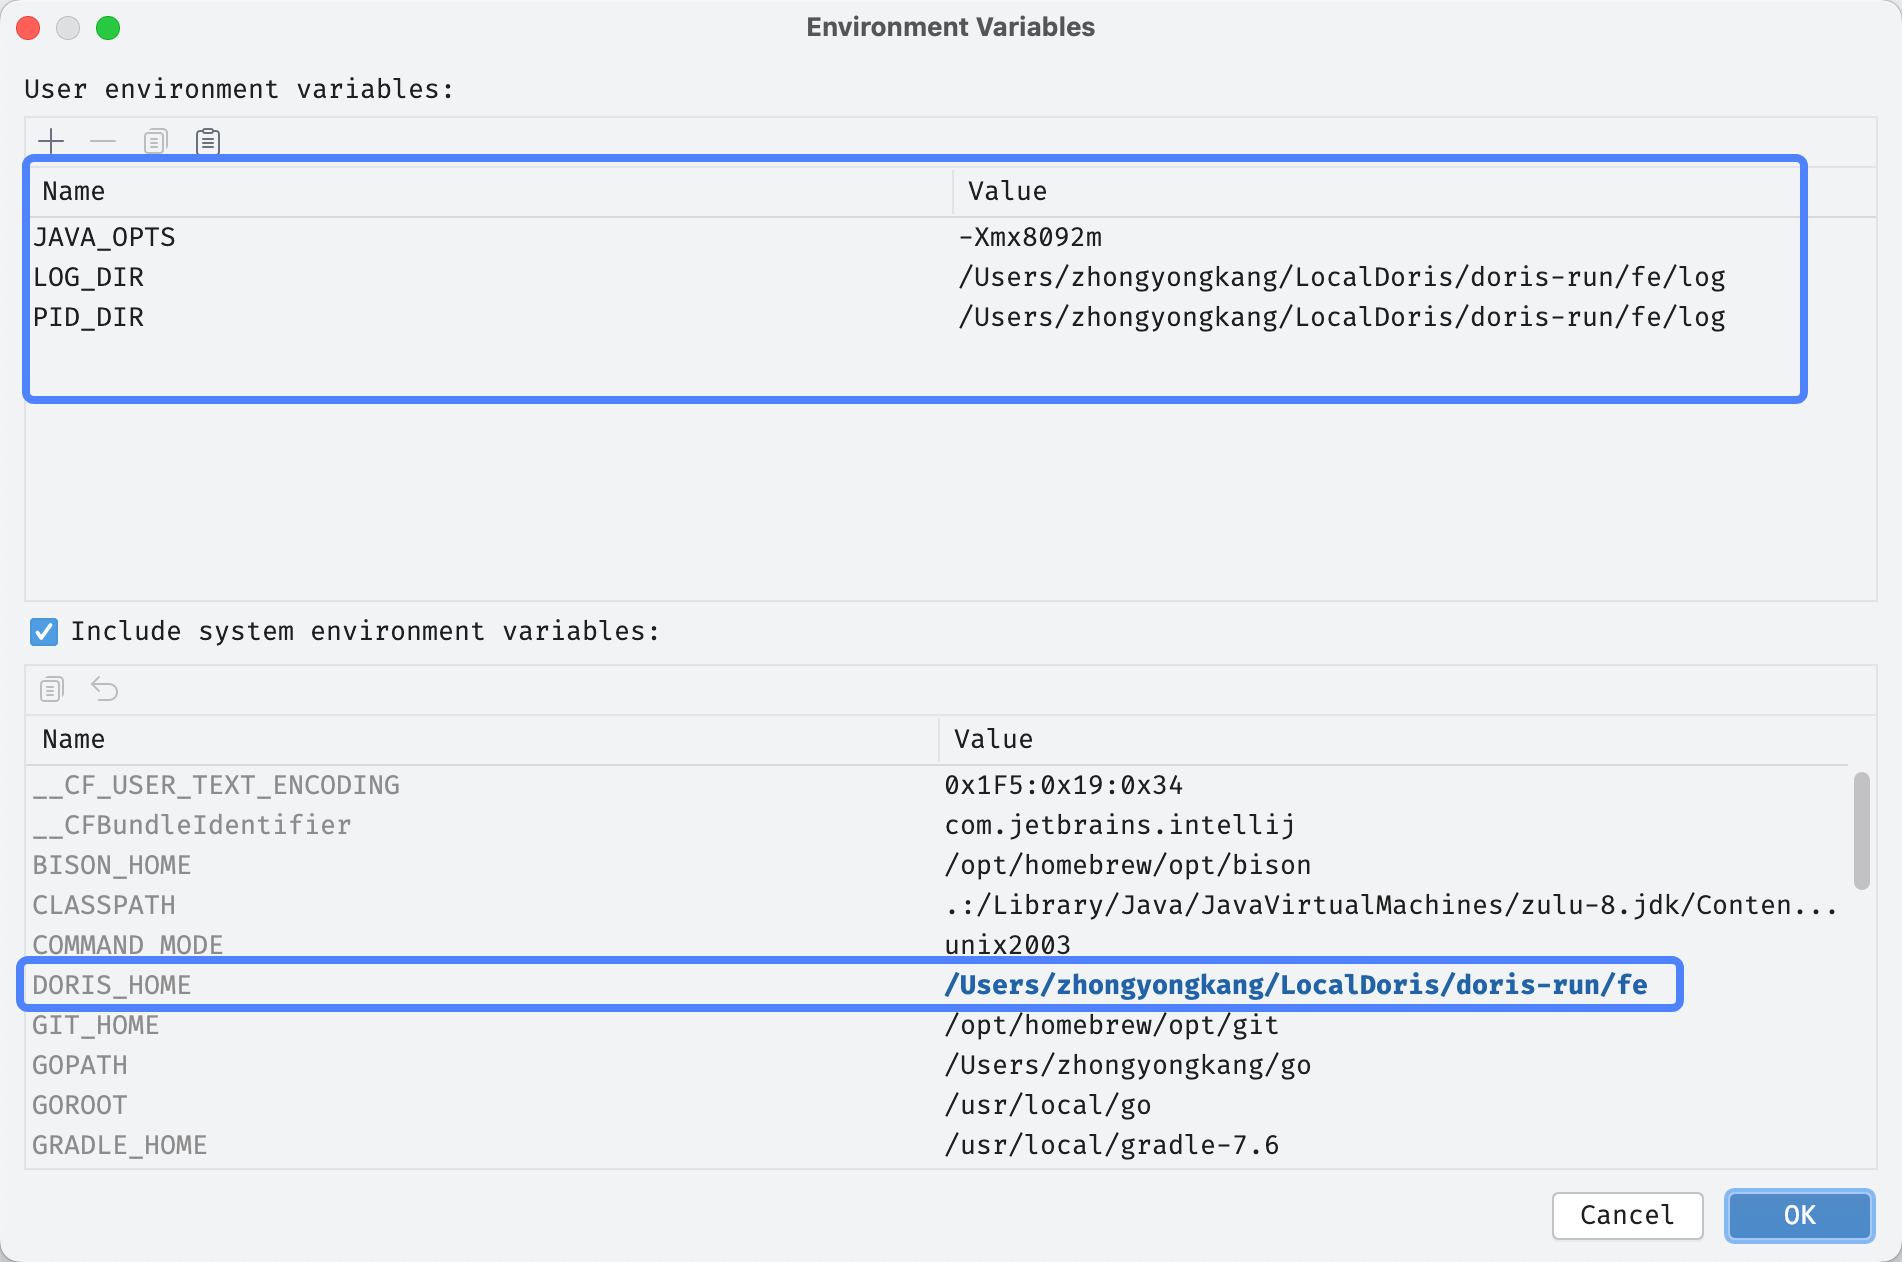
macOS 下的参考配置(环境变量的 DORIS_HOME 指向你 copy 出来的 Doris 运行目录):
| 环境变量 | 示例值 | 说明 |
|---|---|---|
JAVA_OPTS | -Xmx8092m | JVM 堆参数 |
LOG_DIR | ~/DorisDev/doris-run/fe/log | FE 日志目录 |
PID_DIR | ~/DorisDev/doris-run/fe/log | PID 文件目录 |
DORIS_HOME | ~/DorisDev/doris-run/fe | FE 运行目录(不是源码目录) |
JAVA_OPTS=-Xmx8092m
LOG_DIR=~/DorisDev/doris-run/fe/log
PID_DIR=~/DorisDev/doris-run/fe/log
DORIS_HOME=~/DorisDev/doris-run/fe
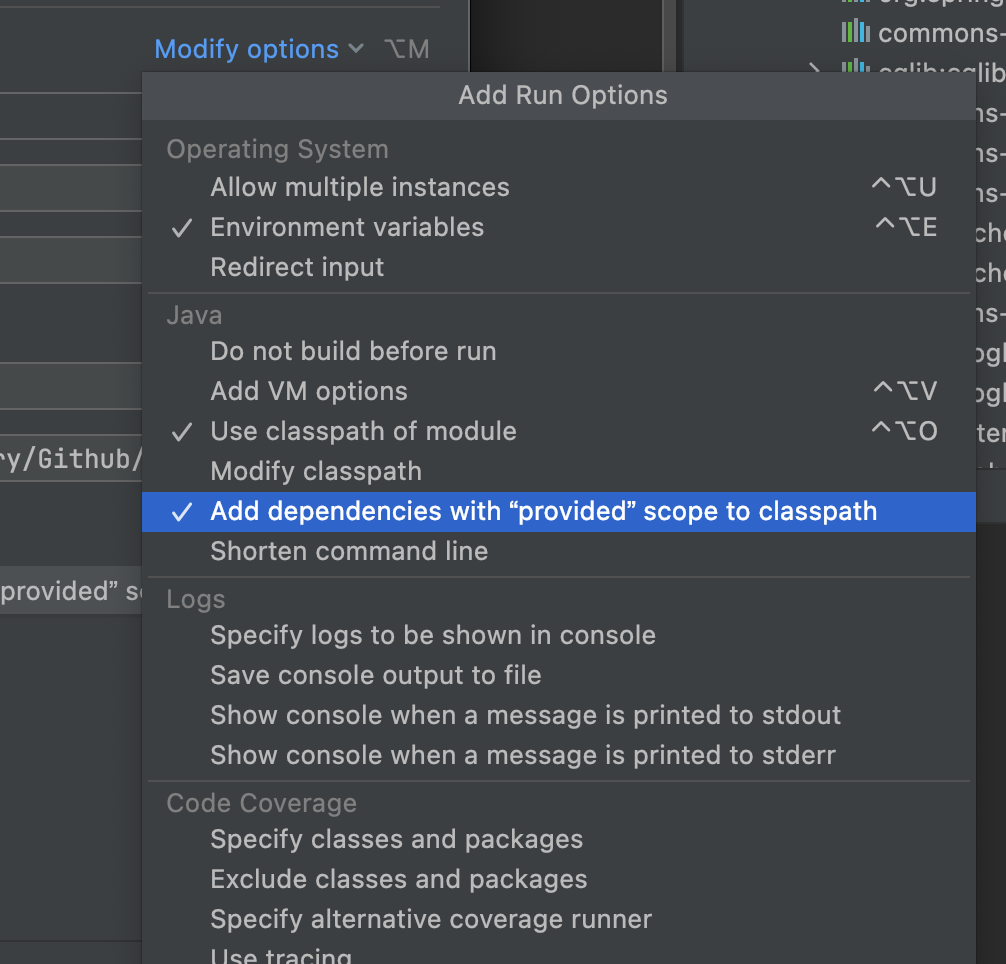
4.6 配置 Modify options
由于部分依赖使用了 provided,IDEA 需要做特殊配置:在 Run/Debug Configurations 设置中点击右侧 Modify options,勾选 Add dependencies with "provided" scope to classpath。
5. 启动 FE
点击 Run 或 Debug,IDEA 会开始编译,编译完成后 FE 即启动。
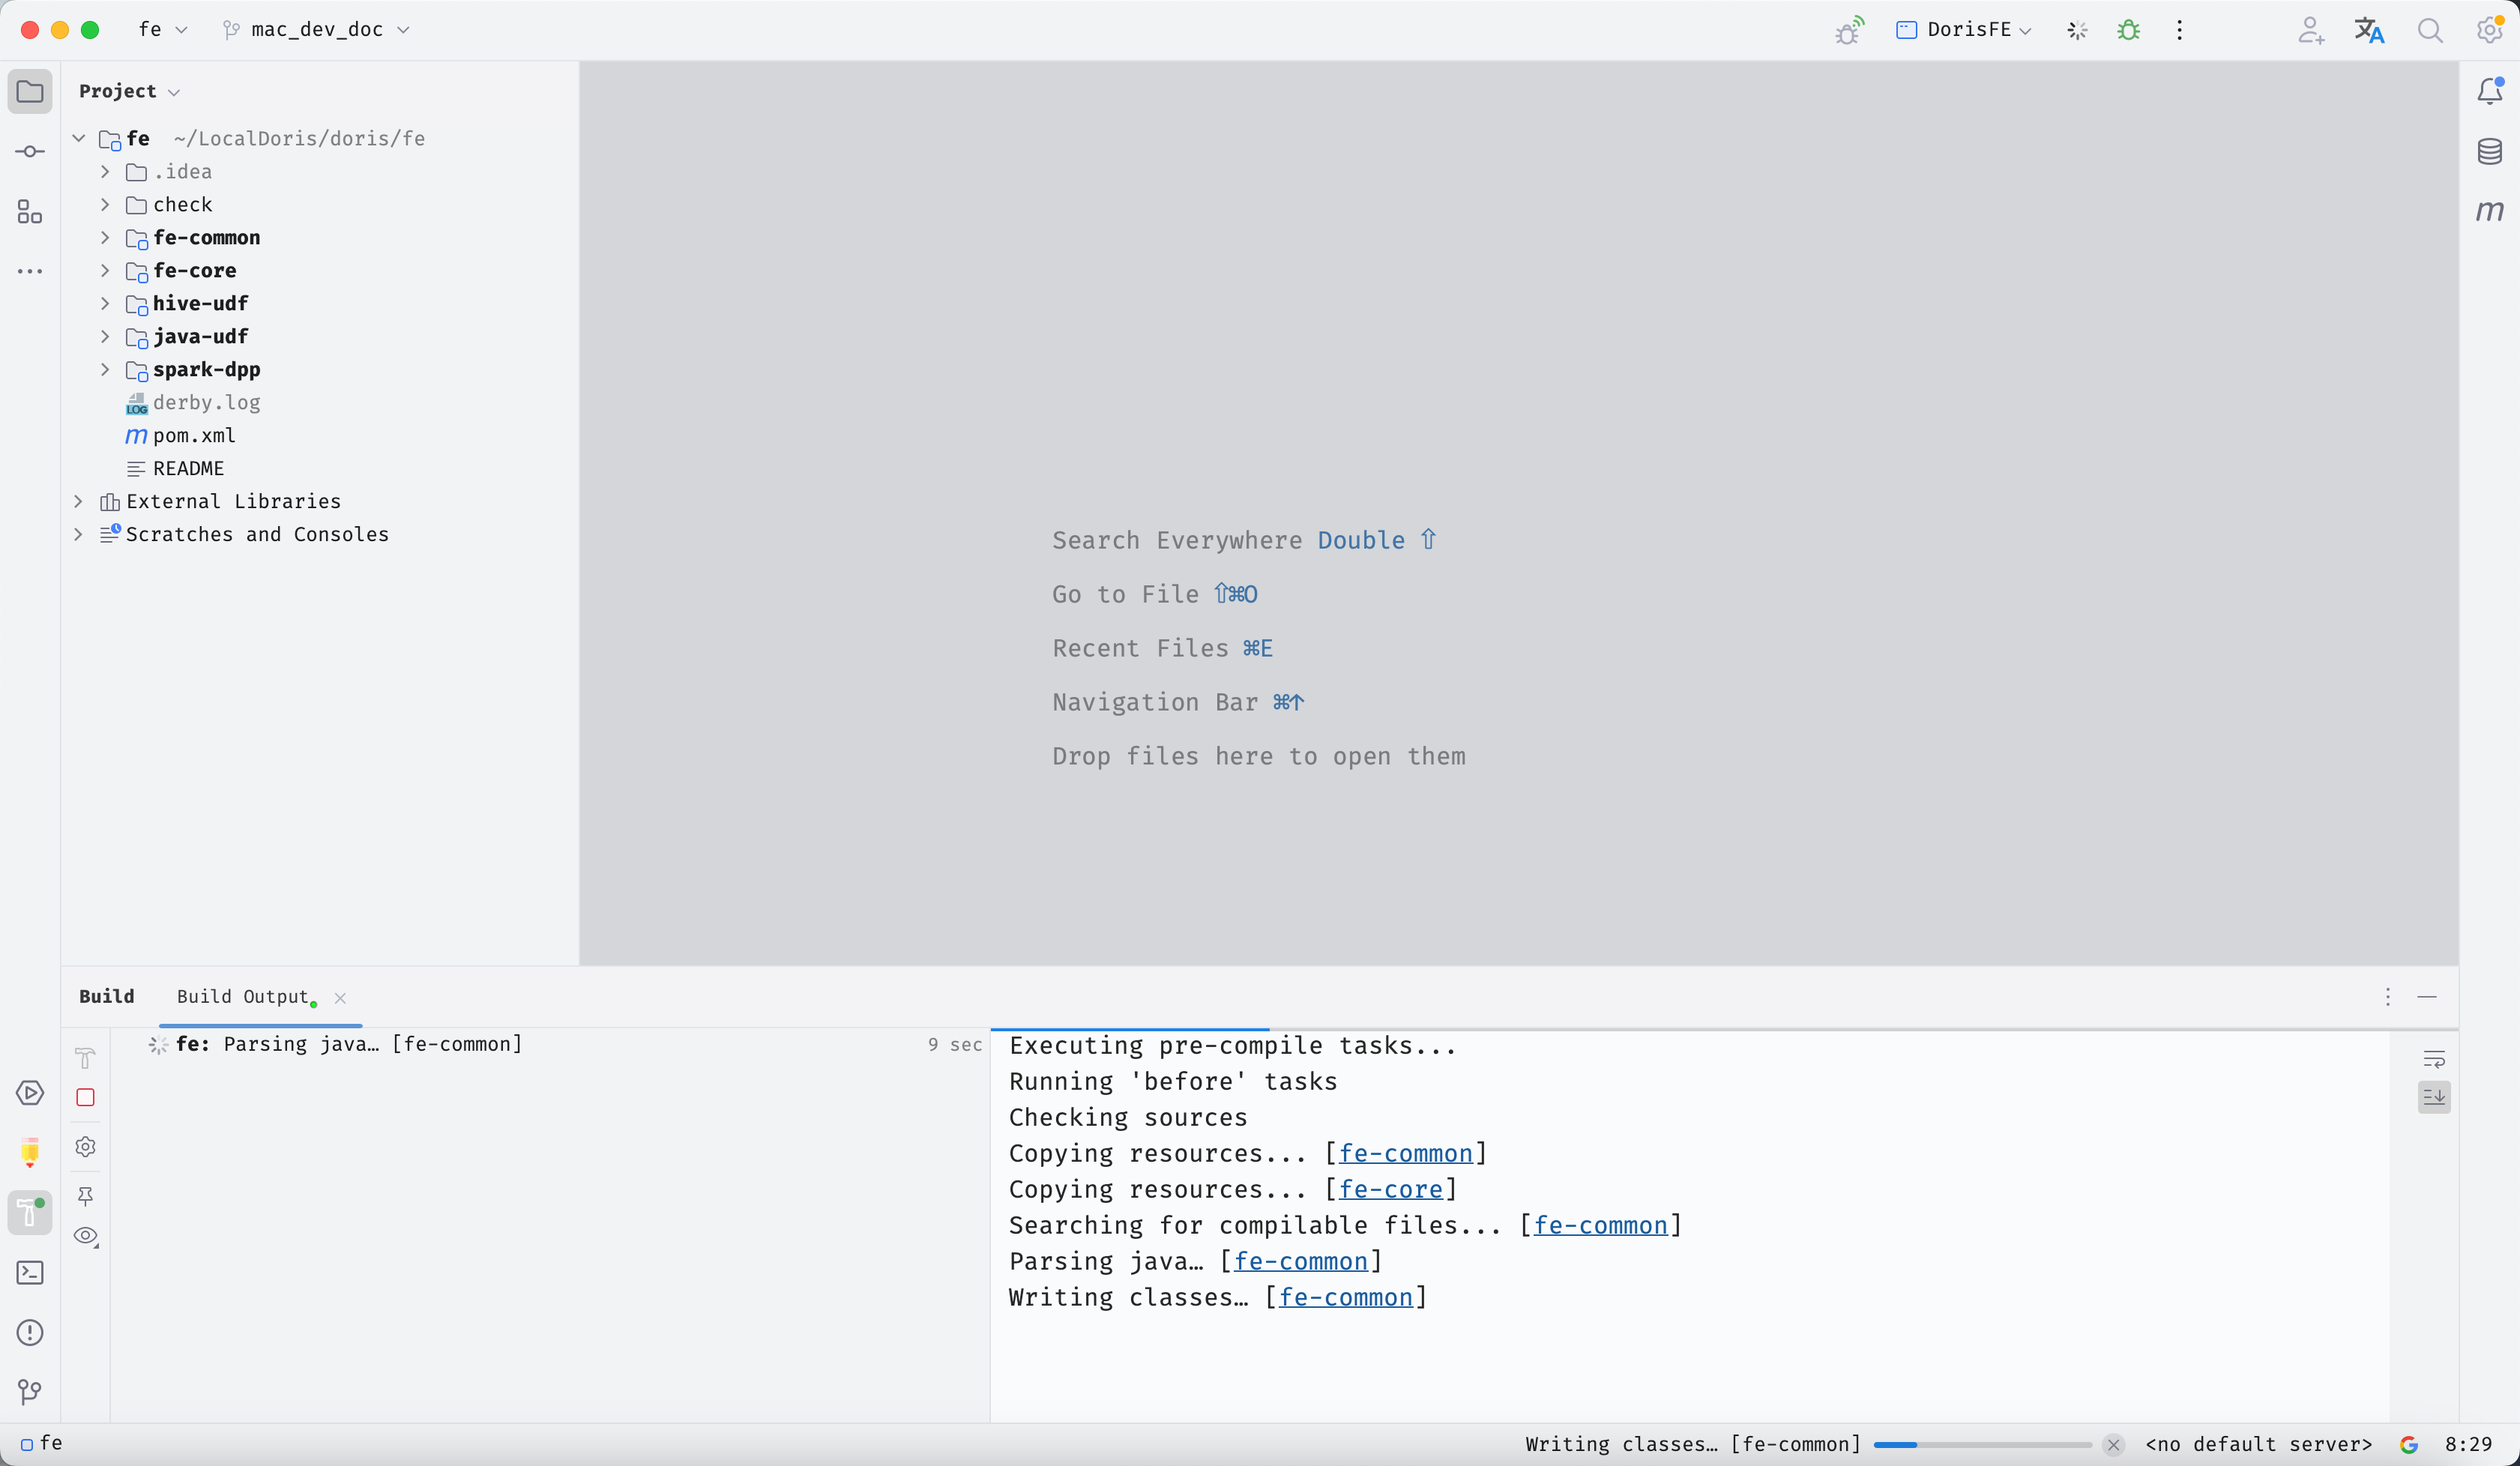
现在你就可以开始 FE 的开发与调试了。
6. 常见问题(FAQ)
Q1:启动报 ClassNotFoundException 或部分依赖找不到
未在 Run/Debug Configurations 中勾选 Add dependencies with "provided" scope to classpath。参考 4.6 节 处理。
Q2:generated-source.sh 报 thrift version mismatch
thirdparty/installed/bin/thrift 的版本与 Doris 版本不匹配。参照 1.2 节 的版本对照表重新安装。
Q3:FE 启动后无法被 BE/客户端访问
检查 fe.conf 中的 priority_networks 是否配置为本机/容器可达的网段;macOS + Docker BE 场景见 4.4 节提示。